Dear SAPLearners, in this blog post we will learn how to set up notifications in SAP Fiori 2.0 Launchpad.
Introduction
Notifications are an effective way to make users aware of situations that require their timely action or attention. For example in workflow scenarios, such as approval of purchase orders, etc.
All notifications are displayed in Notification Center. It can be enabled per user in the SAP Fiori Launchpad. Each notification can offer quick actions and are able to start a suitable app showing the details for the notification topic.
To set up notifications in Fiori 2.0, configuration steps need to be performed both in Front-end(Gateway) server and Back-end server(S/4 HANA)
Step-by-Step Configuration Steps
Below are the configuration steps on the front-end system(Gateway)
- Activate ICF service for OData V4 ( /sap/opu/odata4 )
- Publish Service Group ( /IWNGW/NOTIFICATION )
- Activate ICF service for Push Channels( /sap/bc/apc/iwngw/notification_push_apc )
- Maintain and Activate Push Channels ( SAP_WEBSOCKET )
- Enable notifications via catalog ( /UI2/CONFIG_NOTIFICATION )
Let’s get started.
Log on to the front-end system and proceed with the below steps
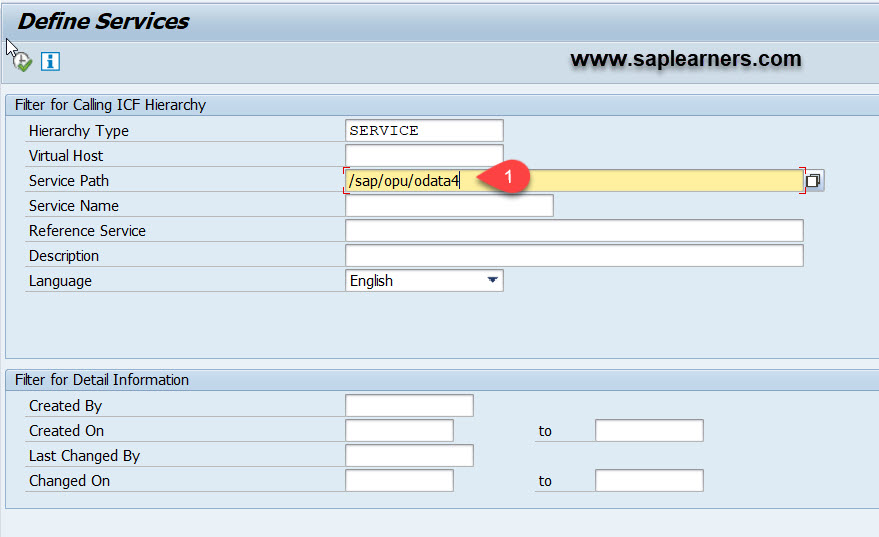
1. Go to SICF transaction and provide the service path /sap/opu/odata4
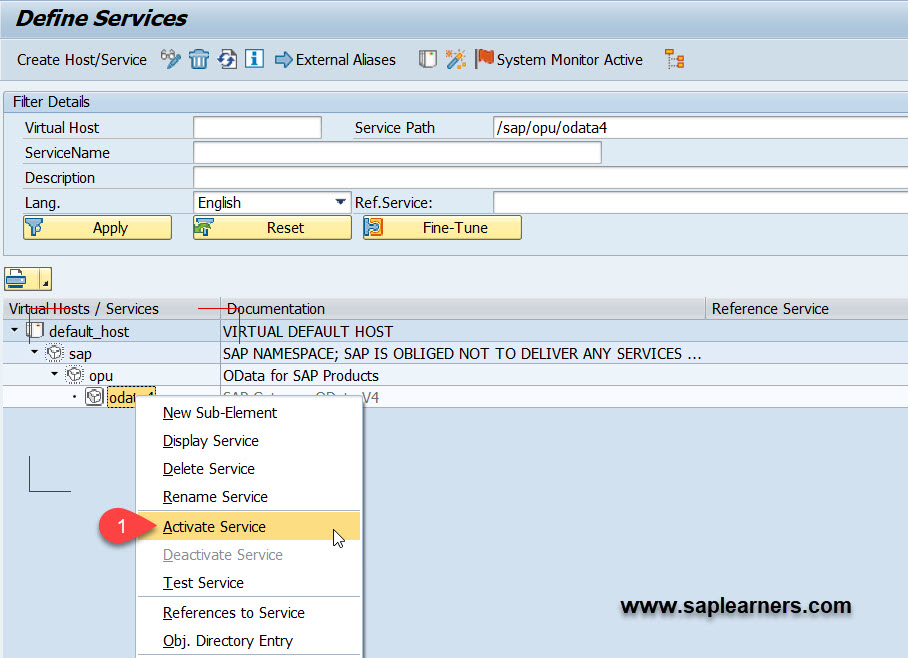
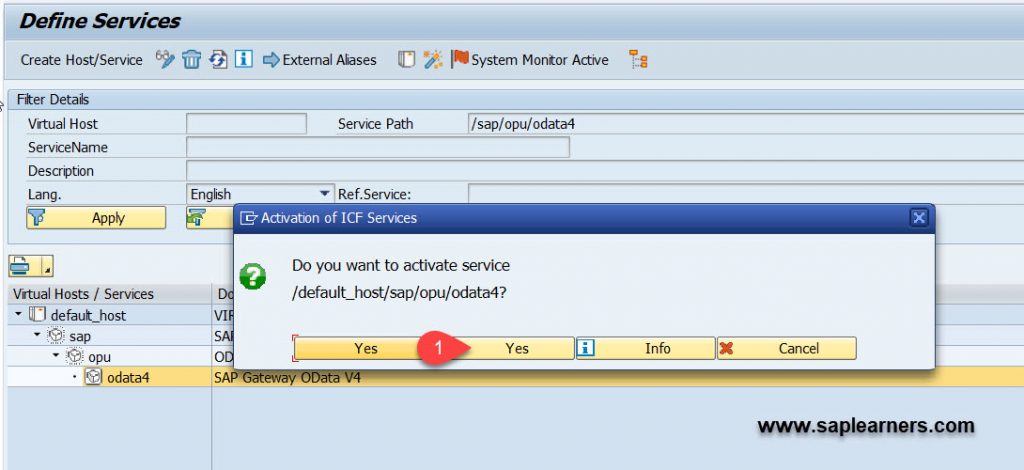
2. Right-click on the ICF node to active the service.
3. Go to transaction /IWFND/V4_ADMIN.Add publish service group /IWNGW/NOTIFICATION with system alias LOCAL.
Note: Add “/n” in-front of the transaction while accessing the transaction code.
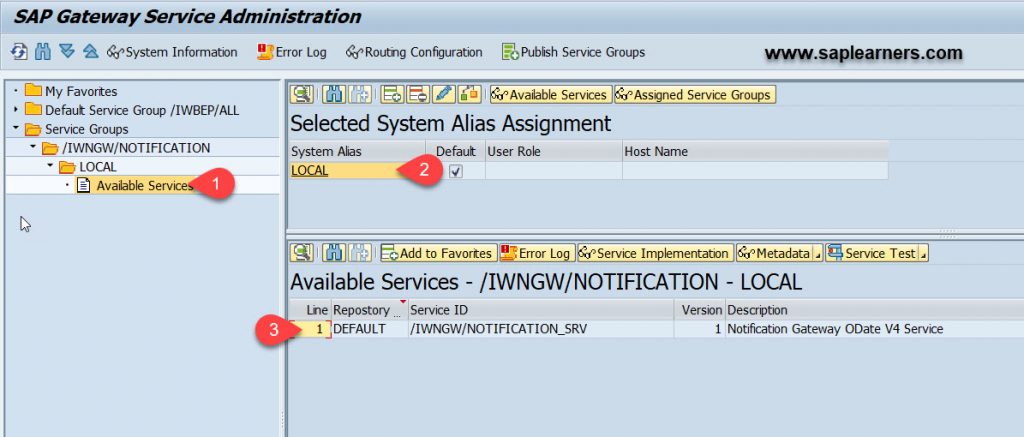
To add a publish service group, hit the “Publish Service Groups” button in the application bar.
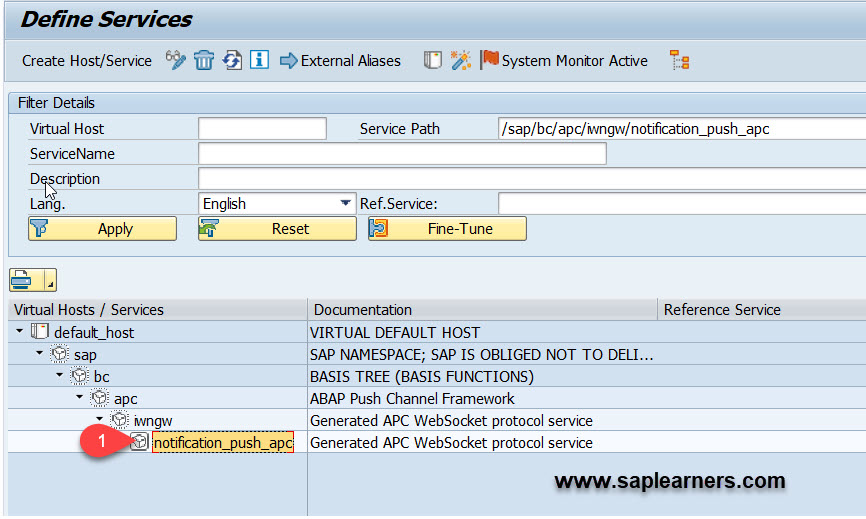
4. Notifications are built on ABAP Push Channel(APC) framework. To enable underlying APC WebSocket protocol, activate the ICF service /sap/bc/apc/iwngw/notification_push_apc using transaction SICF(similar to step-1)
5. Launch transaction SPRO and navigate to the below path
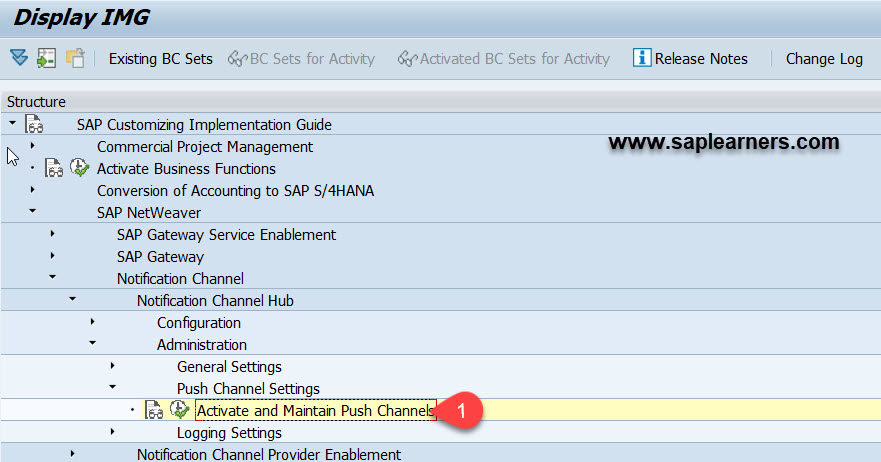
6. Maintain and activate the push channel ID SAP_WEBSOCKET like below.

Finally, it’s time to enable the notification center to the user.
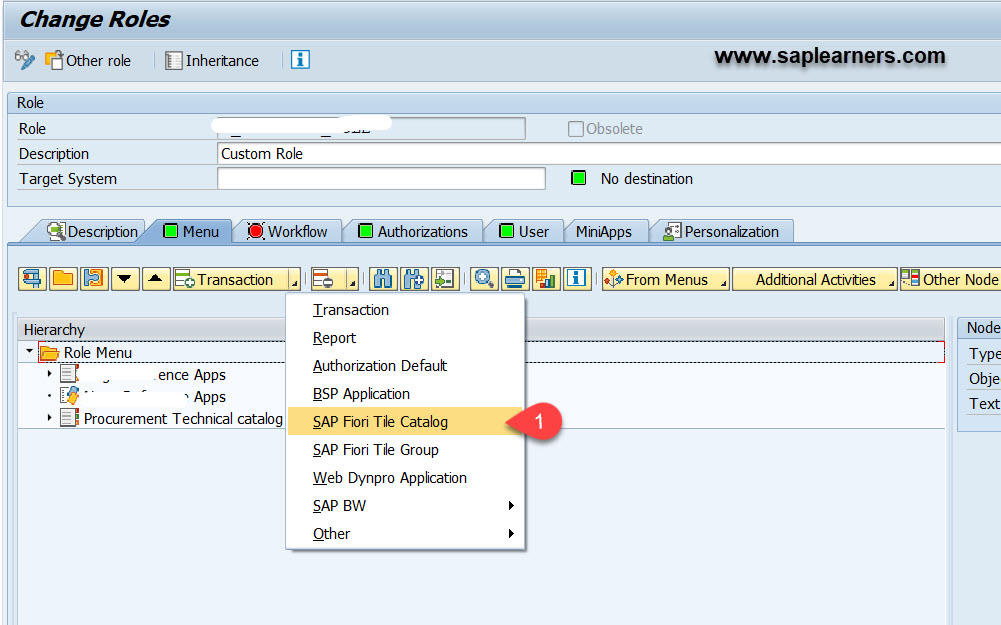
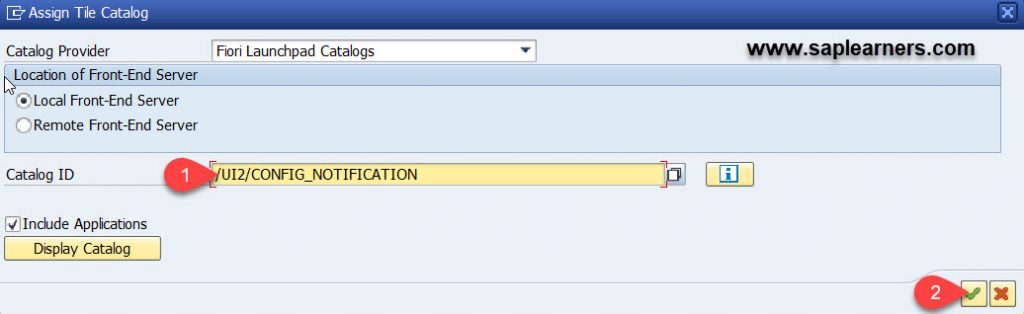
SAP provided a predefined catalog: /UI2/CONFIG_NOTIFICATION which contains the target mapping to enable notifications in SAP Fiori Launchpad.
7. Add the catalog to a PFCG role and assign the role to the user.
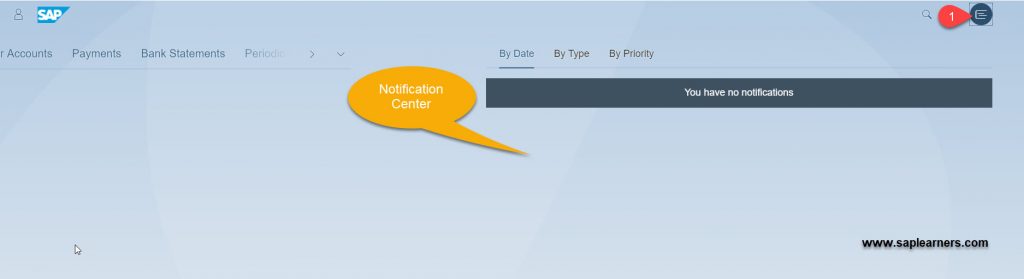
After all these configurations steps, the notification button will appear like below in SAP Fiori Launchpad.
Conclusion
Congrats!! you have successfully performed the configurations steps in front-end server. In our next blog we will continue the configuration steps in back-end server.
Here are the links for both configuration steps both in front-end and back-end systems.
https://saplearners.com/how-to-setup-notifications-in-sap-fiori-2-0-part1/
https://saplearners.com/how-to-setup-notifications-in-sap-fiori-2-0-part2/
Please feel free to comment and let us know your feedback. Subscribe for more updates
If you liked it, please share it! Thanks!


