Hello everyone, in this tutorial, we will learn How to deploy SAPUI5 application into ABAP NetWeaver Gateway System.
Prerequisites
- You should have access to SAP Netweaver Gateway System (or) Front-end server in which UI Add-on installed.
- You should have developed a SAPUI5 application in Eclipse IDE (or) SAP Web IDE.
Step-by-Step Procedure
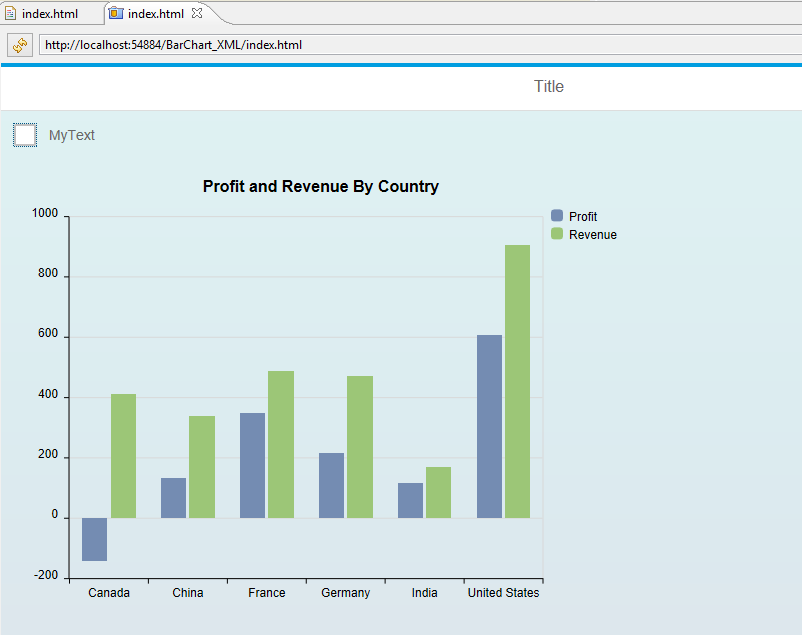
1. Fire up the Eclipse IDE and test the SAPUI5 application and make sure that the application is working fine. For example, I have created a simple column chart SAPUI5 application. Output and structure of the SAPUI5 application looks like below.
 2. Now right click on the application in Eclipse IDE and choose Export and then Export.

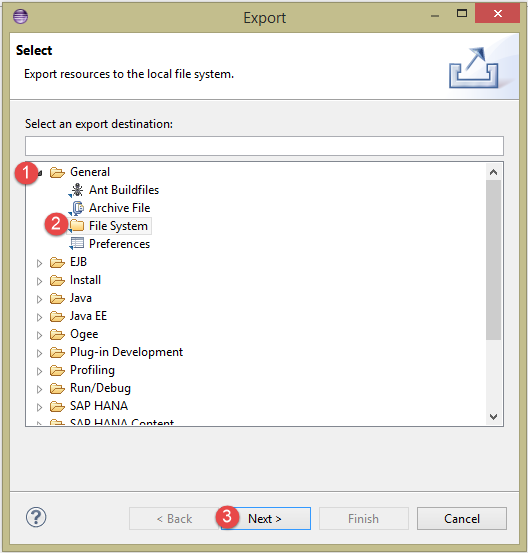
3. In the Export Window, choose File System under General and click Next.
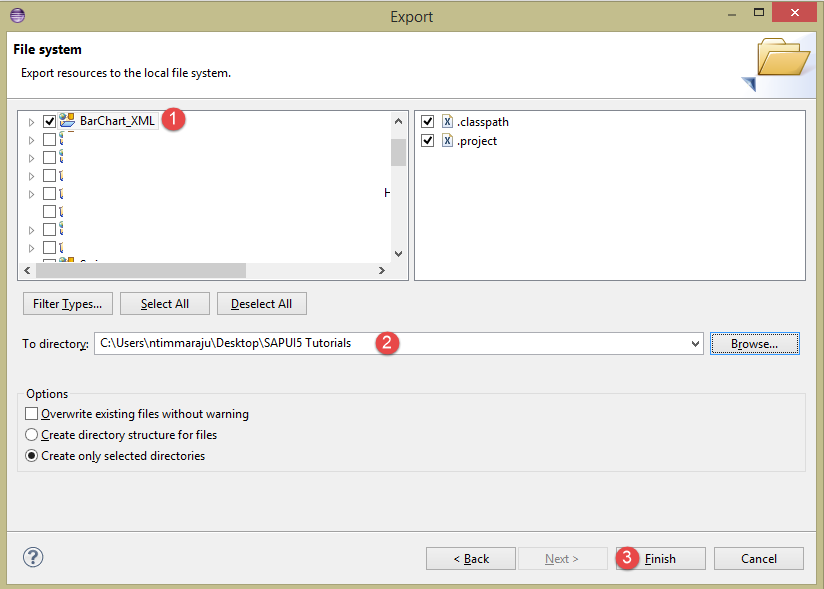
 4. In File System window, select the SAPUI5 application which we want to export and choose the folder in your local desktop in which you want to save the application and click on Finish.
5. Application will be successfully saved.
6. Now log on to the SAP Netweaver Gateway system/Front-end server and go to transaction SE38 and provide the program name as /UI5/UI5_REPOSITORY_LOAD and click on execute. You will see the below screen.

7. Provide the name of the SAPUI5 Application and choose Upload, now execute the report.
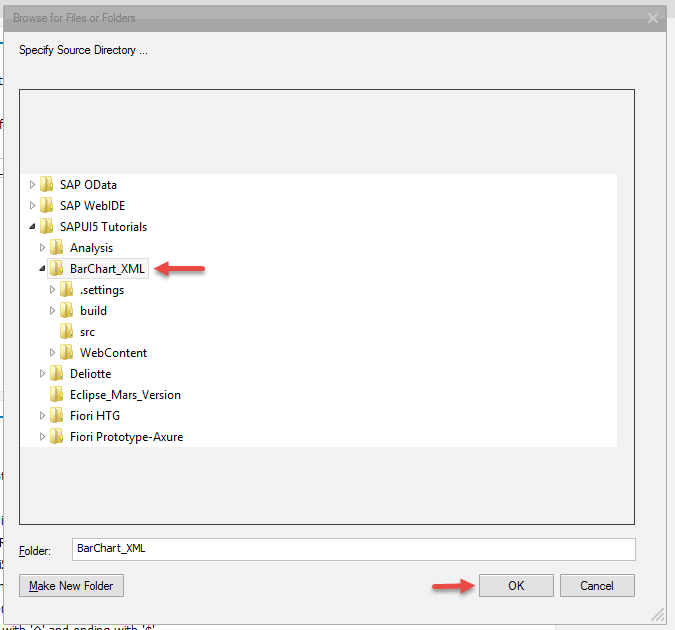
 8. You will see a popup to choose the folder in which you have saved the SAPUI5 application in the Step-4. Once have selected the folder, click on OK.
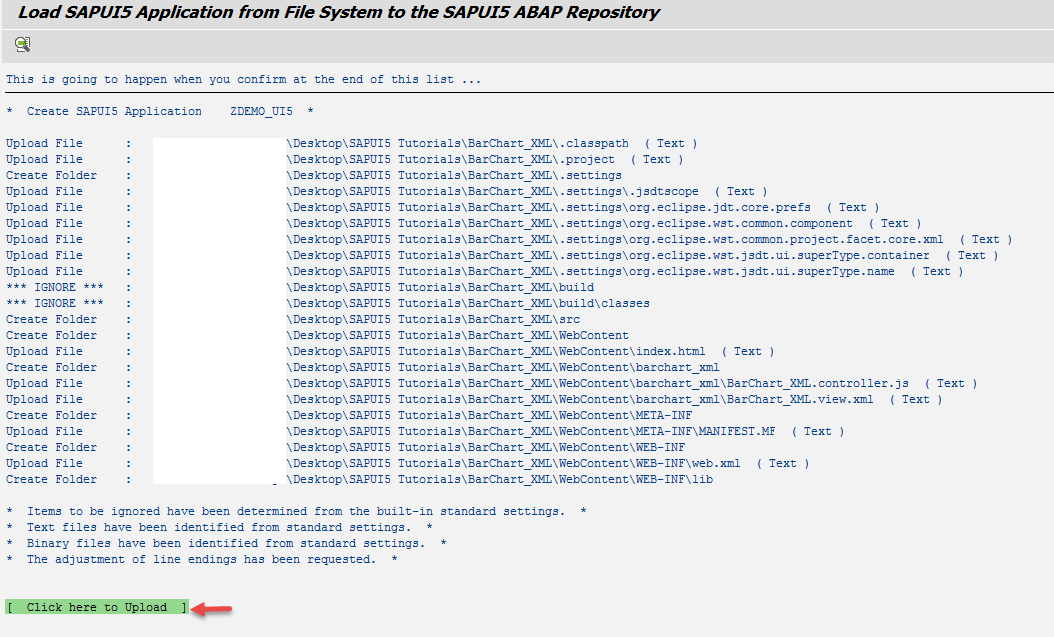
 9. You will see a report displayed like below, which contains all the files which are going to create.Please verify all the files which are going to create and click on
 ![]()
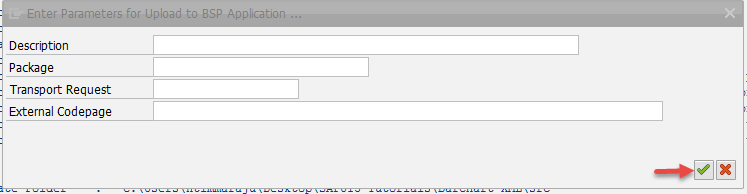
 10. A popup window will appear like below. Enter the parameters in the window and click OK.These parameters are not mandatory.
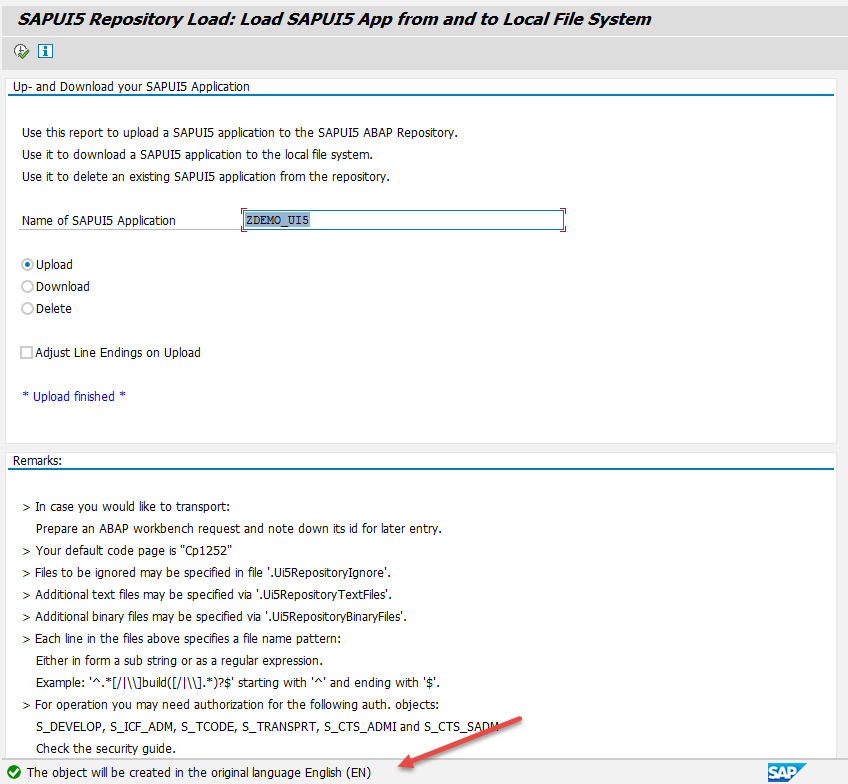
 11. On successful upload, you will be re-directed to initial screen with a success message like below.
 12. Now we need to test the SAPUI5 application which is deployed. Go to the transaction code SICF and enter the Service Path as below. You may need to adjust the path to your needs.
 13. You will be navigated to below screen, on this screen right click on the SAPUI5 application and choose Test Service.
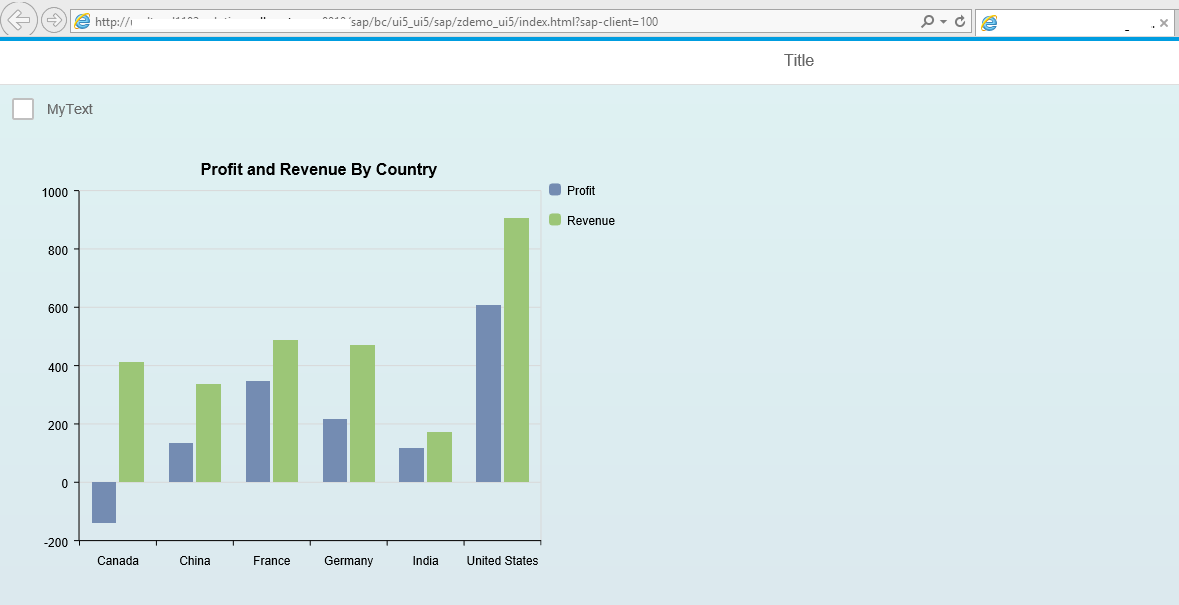
 14. SAPUI5 application will be opened in a browser and should see the output.
Congrats, you have successfully deployed SAPUI5 application into SAP Netweaver Gateway System.
Please stay tuned to us for more SAPUI5 tutorials.Please feel free to comment and let us know your feedback. You feedback will keep us alive.


Comments are closed.