Hello everyone, in this SAPUI5 tutorial we will see how to create a Split App or Master-Detail SAPUI5 application in SAP.
Prerequisites
- You should have knowledge on OData services. Click here.
- You should have implemented the first part of the SAP UI5 split app demo application.
Step-by-Step Procedure
In our first part of the Split App (or) Master-detail SAPUI5 application we have built the master page, now we will built the detail page and when we select any item in the master page list we need to display the details of product category in the detail page.
1. Double click on the “DetailView.view.js” to design the detail page to display products which belongs to a category. Copy and paste the below code in the detail view.
var oTable = new sap.m.Table("idPrdList", {
		inset : true,
		headerText : "List of Products",
		headerDesign : sap.m.ListHeaderDesign.Standard,
		mode : sap.m.ListMode.None,
		includeItemInSelection : false,
		});

// Table Column Headers
var col1 = new sap.m.Column("col1",{header: new sap.m.Label({text:"Product ID"})});
oTable.addColumn(col1);

var col2 = new sap.m.Column("col2",{header: new sap.m.Label({text:"Description"})});
oTable.addColumn(col2);

var col3 = new sap.m.Column("col3",{header: new sap.m.Label({text:"Price"})});
oTable.addColumn(col3);

// Table Column Items
var colItems = new sap.m.ColumnListItem("colItems",{type:"Active"});

var txtNAME = new sap.m.Text("txtNAME",{text:"{ProductID}"});
colItems.addCell(txtNAME);

var txtNAME2 = new sap.m.Text("txtNAME2",{text:"{ProductName}"});
colItems.addCell(txtNAME2);

var txtNAME3 = new sap.m.Text("txtNAME3",{text:"{UnitPrice}"});
colItems.addCell(txtNAME3);

oTable.bindAggregation("items","/value",colItems);

return new sap.m.Page({
		showNavButton : true,
           	title: "Products Page",
		content: [oTable],
		});
What we have done in the previous step
- Created a table with three columns using sap.m.Table and sap.m.ColumnListItem.
- Bind the aggregation to the table.
- Created a Page which contains the above created table.
2. Go back to Master View and add the “itemPress” event to the list by adding the below code.
olistCatgery =  new sap.m.List("idHdr", {
			inset : true,
			itemPress : function(oEvent) {  //Item Press Event
			 oController.onSelect(oEvent); }
		});
3. Go to Master View controller and implement the method “onSelect”.
// To get the selected Category ID
var oItemSelect = oEvent.getParameter("listItem");
var Context = oItemSelect.getBindingContext();
var CatID = Context.getProperty("CategoryID");

// Get the products for the select Category ID
var sUrl = "http://services.odata.org/Northwind/Northwind.svc/Categories(" + CatID + ")/Products?$format=json";
var omodel = new sap.ui.model.json.JSONModel(sUrl);
sap.ui.getCore().byId("idPrdList").setModel(omodel);
What we have done in the above step.
- Get the Category ID for the selected category.
- We created a JSON model and pass the url of the OData service to get the list the product and then set the model to the list by calling setModel( ) method.
- Set the Model of the table in the detail view
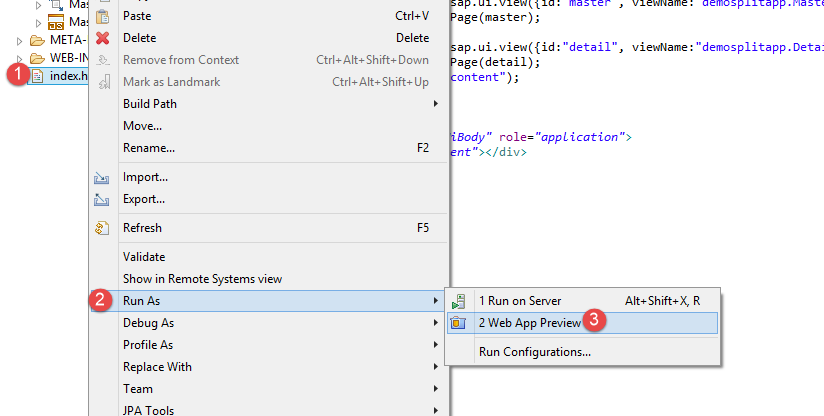
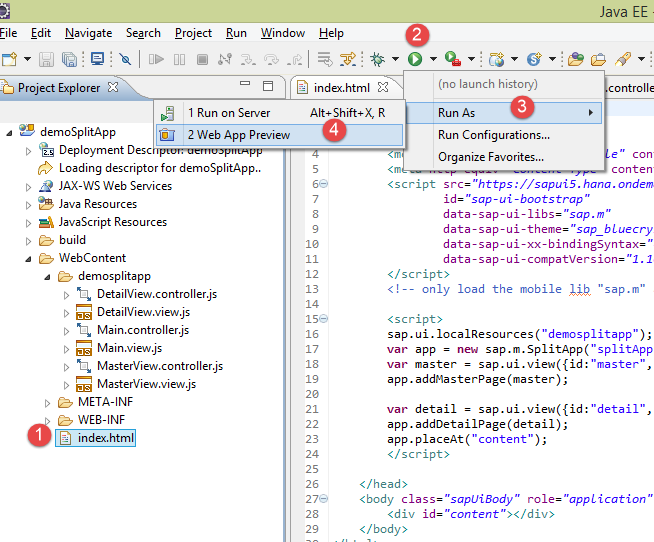
4. We have successfully created all the views/pages required. Save all the views and double click on the index.html and right click → Run As → Web App Preview.
You can also hit the execute button in the toolbar
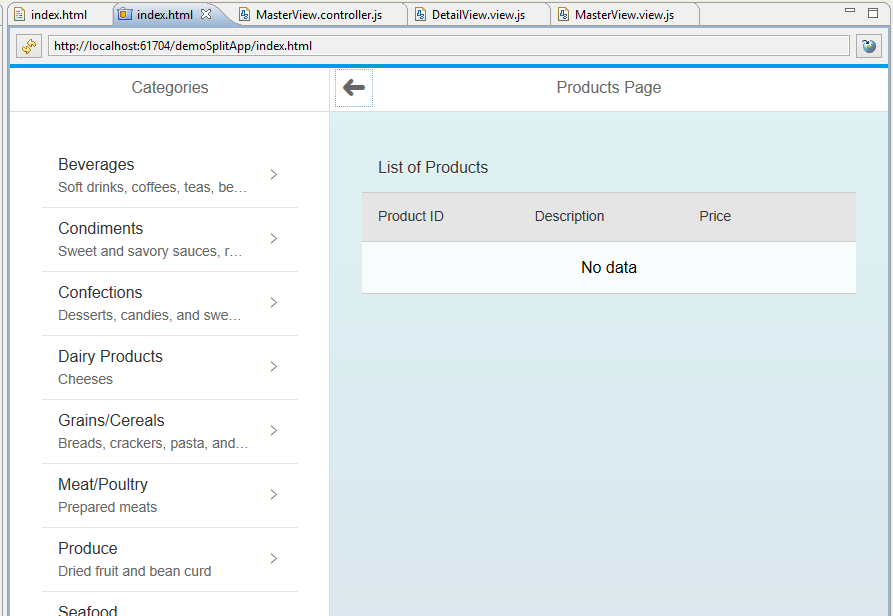
5. You should see the output like below
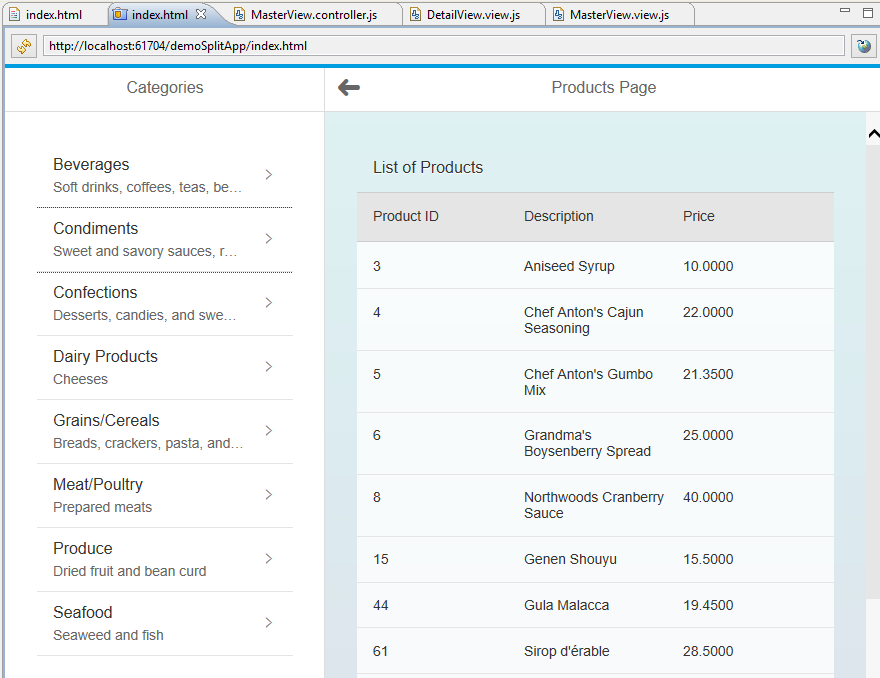
6. Now select any category from the list and you should see the list of products for that selected category in the detail view.
You can also see the video below
Congrats, you have successfully created Master-Detail App/Split App in SAPUI5.
Please stay tuned to us for more SAPUI5 tutorials.Please feel free to comment and let us know your feedback.


Comments are closed.