Hello every one, in this netweaver gateway tutorial we will learn the concept of ETag in SAP Netweaver Gateway.
ETags
ETags or entity tags are used for optimistic concurrency control. Simple put, they are used for locking the resources in SAP OData service calls. Like in ABAP, we can apply locks on the OData resources to make the data consistent in the backend systems by using ETags.
We use ETags in PUT, MERGE and DELETE HTTP methods. We have two methods of locking mechanisms in HTTP calls, they are
- Optimistic Locking
- Pessimistic Locking
Optimistic Locking
Optimistic locking is the locking mechanism used in stateless calls.Client application will not actual lock the data but check the data before updating it to make sure that update is happened on latest version.
ETag support in SAP Netweaver Gateway
SAP Netweaver Gateway OData services are stateless calls to the backend system, they support only Optimistic locking mechanism. In-fact you can also achieve the Pessimistic locking but a lot of development is involved, we won’t be discussing this topic here. ETag is supporting in both hub and backend systems.
Supported System Version
SAP NetWeaver 7.40 Gateway Release 2.0 Support Package 09
Business Example
You are looking at a customer information from UI and you want to change the data.By the time you change data,some one has already changed the data.The data you are looking at is not the updated data and when you try to update it it will override the previous data which is not correct.To overcome this we implement ETags in OData service.Lets see how we can do it.
How to Implement of ETag in SAP Netweaver Gateway?
In this section we will see how to make OData service support ETags. Before proceeding further we assume that you are aware of building OData service.
If you are not familiar please click here to access all the SAP Netweaver Gateway tutorials.
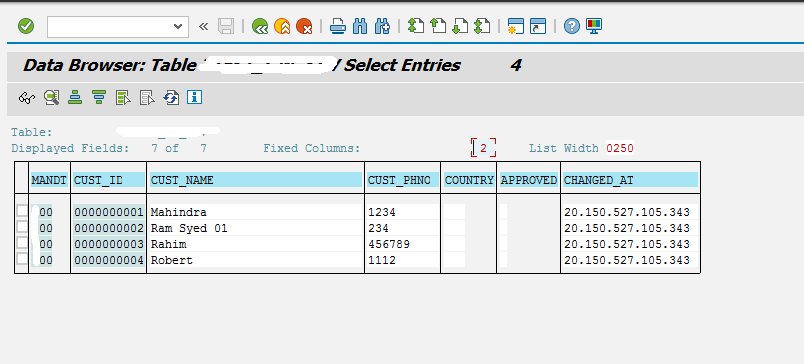
In this example to explain the concept, i have created a custom table with following structure and my OData service is based on this table.
All the CRUD and Query operations are applied on this custom table. You can create table with following structure or use any table.
Step-by-Step Procedure
Follow the below steps
1. Create an OData service in Gateway builder SEGW. OData service structure will look like below
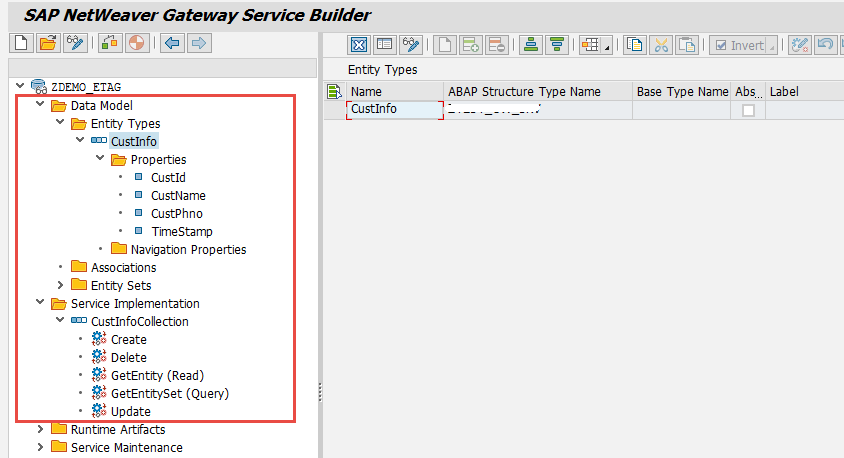
2. I created an Entity Type “CustInfo” and Entity Sets “CusInfoCollection”with above properties.I have implemented GET_ENTITYSET , GET_ENTITY methods to get the data from the table.Code in these methods will look like below.
3. To make the OData service ETag support we need to enable ETag field on Entity Type of OData service. In this example i have used “TimeStamp” as the ETag field to check while updating the data.You can choose any field as you want as long as it helps in identifying the versioned data in backend systems.
4. Double click on the Entity Type “CustInfo” and choose TimeStamp under ETag column.

5. Now you have enabled the OData service as ETag support on an Entity Type. Activate and Re-generate the service. Test the service in SAP Netweaver Gateway Client /IWFND/GW_CLIENT
Call the below URI
/sap/opu/odata/sap/ZDEMO_ETAG_SRV/CustInfoCollection
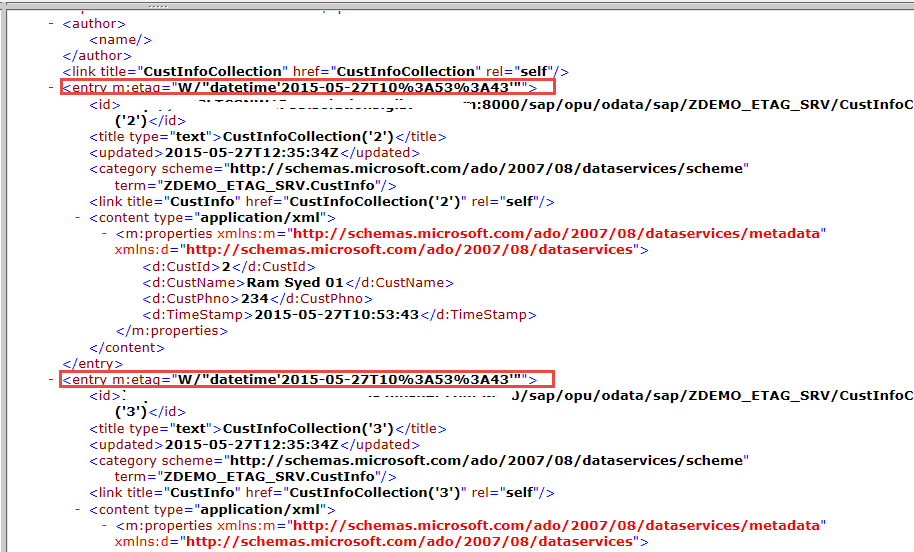
6. In the above Entity set feed you can see an entry for etag. The value for the ETag is the TimeStamp(CHANGED_AT) field in the Custom table.
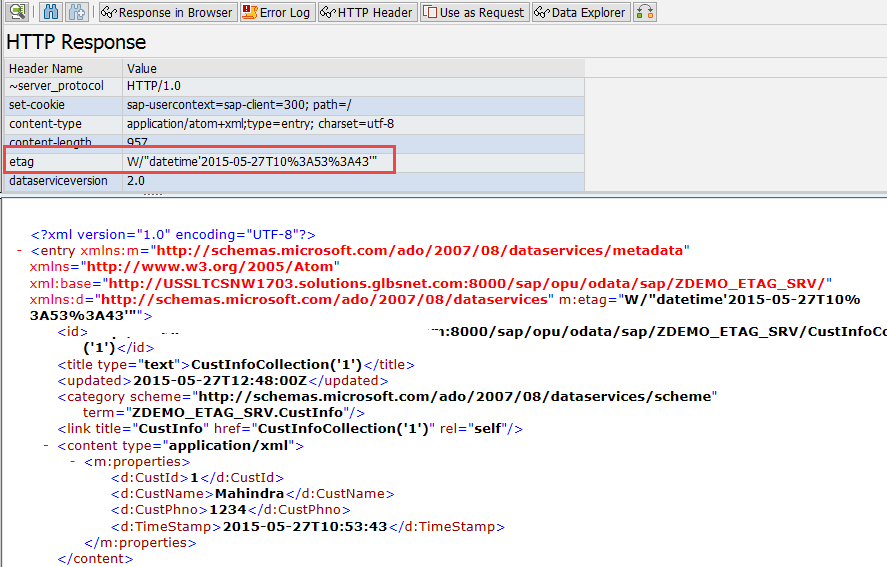
7. Now retrieve a single customer information by providing the customer number in the URI like below.
/sap/opu/odata/sap/ZDEMO_ETAG_SRV/CustInfoCollection(‘0000000001’)
8. Redefine the UPDATE_ENTITY method in DPC extension class and write the code to update the custom table.
9. Now change the data in Step-7 by hitting Use as Request button on the top. All the data will be copied from HTTP Response section to HTTP Request Section.
10. Hit the plus button in the header of the HTTP Request to add the etag value like below.
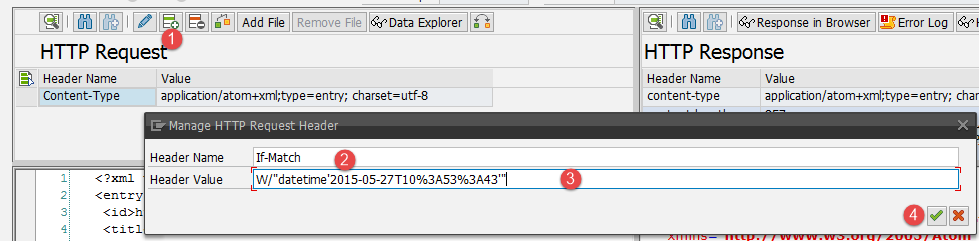
11. Change the name of the customer, change the HTTP method to PUT and hit Execute with below URI.
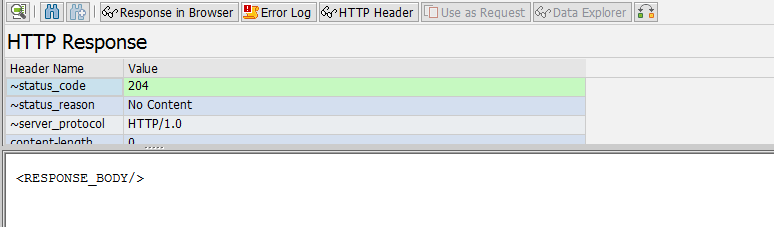
12. Data in the custom table will successfully updated as the ETag values are same for both GET and PUT request.You will see the response with 204 status code like below.
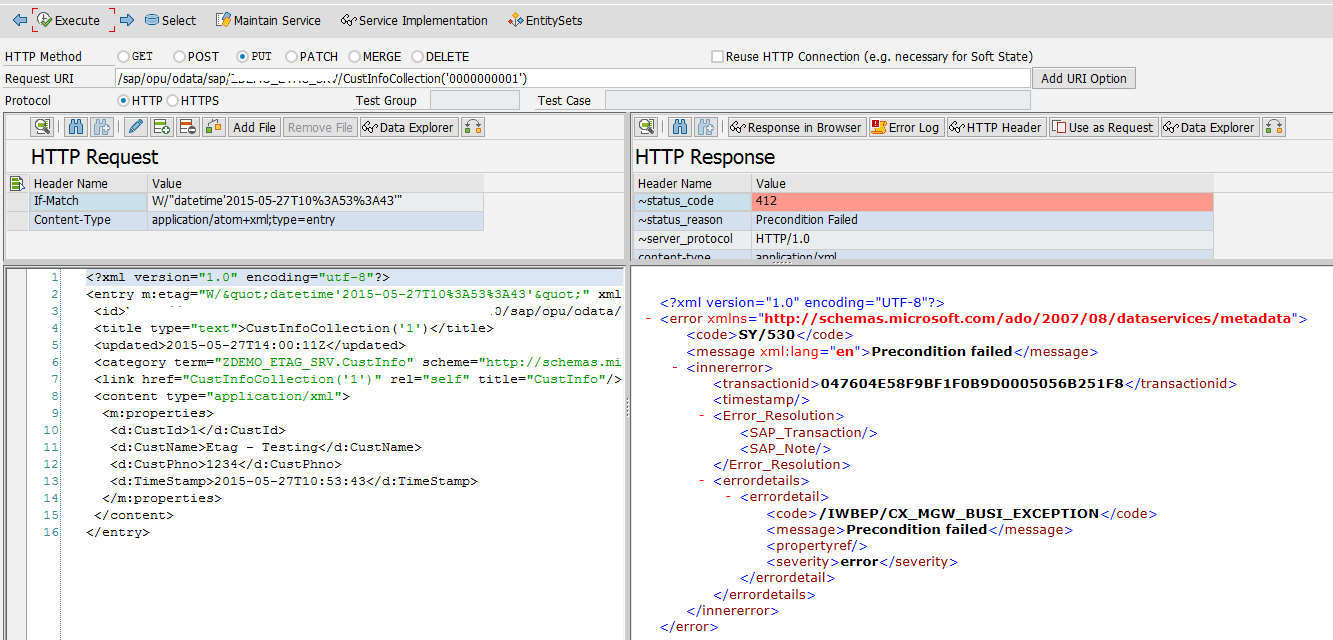
13. Now go back to the table and change the field CHANGED_AT to a different value.
14. Now again Execute the same URI like in Step-11 now you will get an error message saying that Precondition Failed.This is due to the ETags are different for PUT and actual data in the table.
Now you have successfully implemented ETag in SAP Netweaver Gateway. For more SAP Netweaver Gateway tutorials please click here.
Stay tuned to us for more SAP Netweaver Gateway tutorials. Please feel free to comment and let us know your feedback. Thank you. 🙂


Comments are closed.